User Interface
The Vistameet interface is divided into 3 main areas:
| Alignment | Description |
|---|---|
| Left | Sidebar |
| Center | Contacts |
| Right | Workspace |
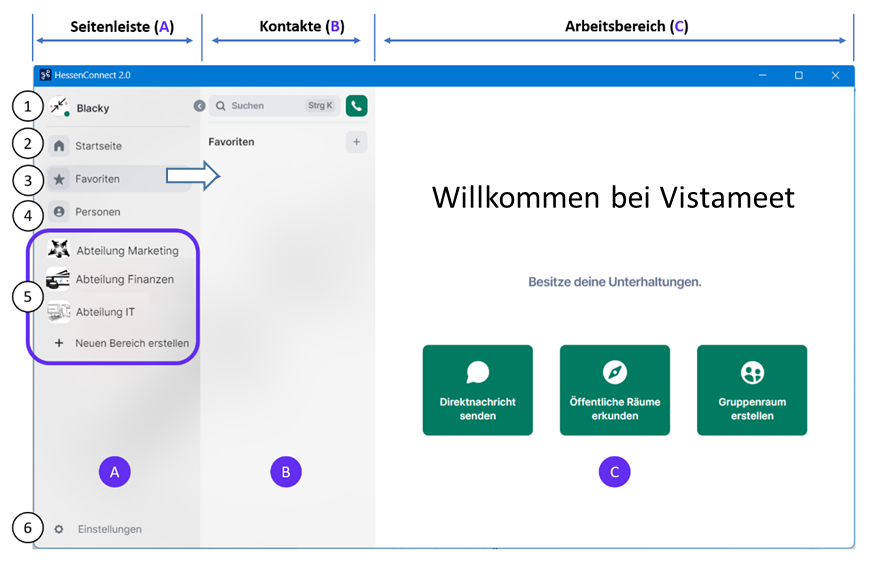
Figure 25: Interface - Vistameet App
Sidebar
Through the sidebar, you can manage all personal settings, your contacts, conferences, and conversations. It can be collapsed and expanded to enlarge the workspace.
Main Areas of the Sidebar
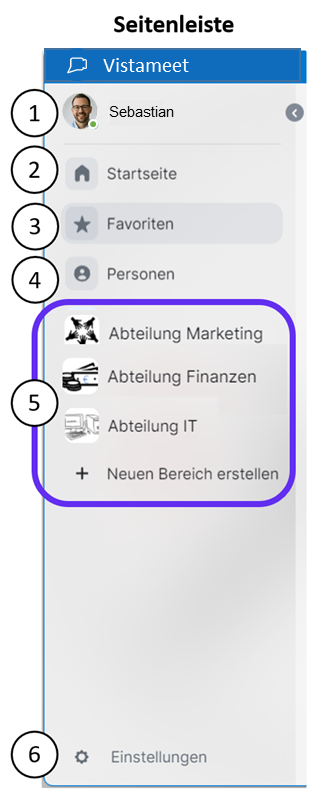
Figure 26: Interface - Sidebar
| Number | Name and Description |
|---|---|
| 1 | "User Menu": Until you have uploaded your own optional profile picture, the first letter of your username is displayed as a symbol. |
| 2 | "Home | All Rooms": When this function is selected, all rooms that you have created or have access to are displayed in the contact area. You can search for additional rooms using the search function in the contact area to possibly join them. |
| 3 | "Favorites": Under the Favorites point, you can add people and/or rooms to your favorites list and thus list them separately. |
| 4 | "People": When this function is selected, all people with whom you have connected via Vistameet are displayed in the contact area. Using the search function in the contact area, you can search for additional people to make contact. |
| 5 |  "Areas": In the lower area of the sidebar, all areas you have joined are displayed. By clicking on "+ Create new area", you can create additional areas. You decide which people and/or rooms are grouped here. > For more information, see the chapter: "[5.1 Areas]". "Areas": In the lower area of the sidebar, all areas you have joined are displayed. By clicking on "+ Create new area", you can create additional areas. You decide which people and/or rooms are grouped here. > For more information, see the chapter: "[5.1 Areas]". |
| 6 | "Settings - Quick Settings": Here you can adjust all settings for your status, the appearance of the program, notifications, and font sizes of Vistameet to your needs. |
How you can configure the sidebar for your user can be found under "[3.2.1.2 Settings - Quick Settings]".
User Menu
By clicking on your own username or your own user profile picture, you access the User Menu. This is subdivided into presence and some setting options: Notifications, Security, All Settings and includes the option to log out of Vistameet (button "Log out").
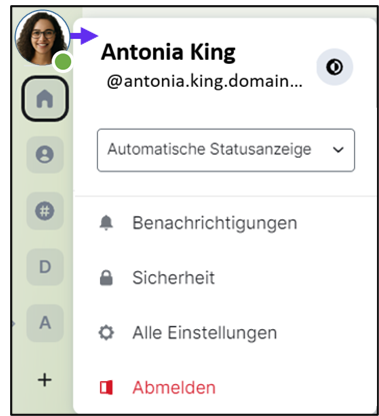
Figure 27: Interface - Sidebar - User Menu
If one of these setting options in the menu is selected, you are redirected to the general settings.
- For more information and possible adjustments, please refer to the chapter "[3.3 Settings - Vistameet App]".
- For more information about the presence status, please refer to the chapter "[3.3.1.1.5 Presence]".
The black, round symbol next to the name, in the upper right menu window, allows quick switching between Light and Dark design.
By clicking "Log out", you can log out of Vistameet. With each logout and subsequent restart of the application, you will be asked to enter your login data again.
In Vistameet, it is not necessary to log out. If you still decide to do so, please read chapter "[3.1.2.1 Frequently Asked Questions about E2E]" beforehand.
Settings - Quick Settings
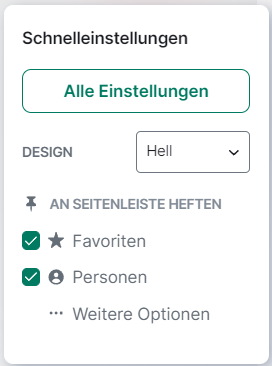
Figure 28: Interface - Sidebar - Quick Settings
In the lower left area of the sidebar is the Quick Settings Menu. This is accessed by clicking on "Settings"  .
.
It provides you with some quickly selectable setting options. For example, you can show or hide "Favorites" as well as "People" groupings in the sidebar by checking or unchecking the checkbox.
For more information, see the respective menu item in chapter "[3.3 Settings - Vistameet App]".
The "All Settings" button opens the settings menu and takes you to the first menu item "General". Via the "More Options" button, you go directly to the sidebar settings.
You can also quickly select between the designs Adapt to system, Light, Dark, Accessible and Hessen via the drop-down menu in the quick settings menu without having to navigate to the settings.
The entire settings menu is discussed in detail in chapter "[3.3 Settings - Vistameet App]".
Contact Area
This area appears when you call up a point from the sidebar, for example. It allows you to select people or teams you want to connect with and start communication.
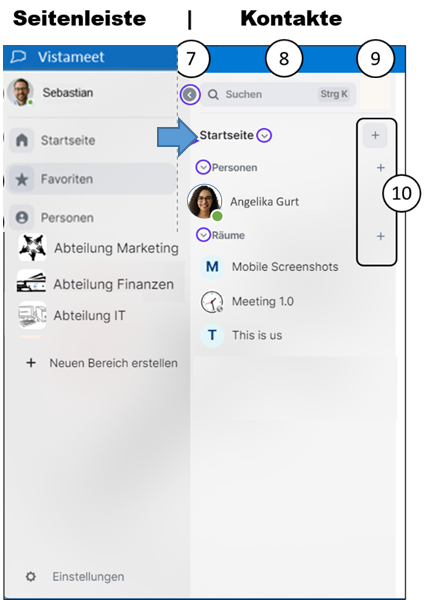
Figure 29: Interface-Contact
Functions in the Contact Area
| Number | Description |
|---|---|
| 7 | "Collapse": To enlarge the workspace, you can comfortably collapse and expand the sidebar. In the contact area, you can horizontally collapse individual areas (Favorites, People, Rooms, Archive). |
| 8 | "Search": If you want to contact additional people or need access to additional rooms or areas, you can search for them using the search function. |
| 9 | "Phone receiver": You can call people or rooms directly via the pop-up search menu. |
| 10 | "+/Add" symbol: Via the "+" symbol, you can add additional contacts or rooms to your contact area. |
If you have already created rooms, joined rooms, or exchanged private messages with people, these are displayed grouped under the respective sub-area (People for individual chats, Rooms for group chats, ...).
If you have left rooms, another sub-item "Archive" appears in the sidebar, where these rooms are collected. You can also "forget" these rooms, then they will no longer be displayed in the sub-item "Archive".
In Vistameet, a "room" generally means a chat history. If this takes place between two people, we speak of direct messages, individual or private chat. In the app, such conversations are displayed in the sub-area "People". (Even if you add another person later.)
In the sub-area "Rooms", chats are displayed that can be either private or public and usually contain more than two people or were created for groups (group conversation).
Sub-areas (Favorites, People, Rooms, Archive)
Sorting
You can sort all sub-areas of the contact area (Favorites, People, Rooms, Archive) by clicking on 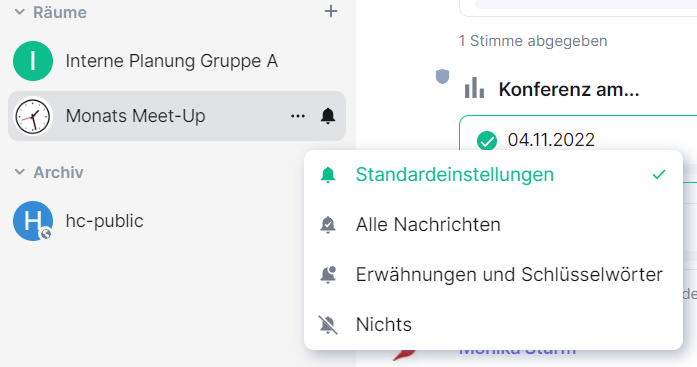 next to the name of the respective category.

Figure 30: Contact Area - Sorting
Select the desired sorting. This is automatically and immediately applied. You can also select whether you want the "message preview displayed", for example.
People | Room Options
Figure 31: Contact Area - People Options | Figure 32: Contact Area - Room Options
With a click on the , the people or room options open.
Here you can add private chats with people or rooms to your "Favorites", set a "Low Priority", or make further "Settings", as well as "leave" the respective room or chat.
In addition to the options already mentioned, with rooms you have the option to invite people to the room and copy the room link.
Favorites
You can add a private conversation with a person or a room to your "Favorites". The person or room appears under the sub-area "Favorites" in the contact area. The grouping does not distinguish whether this is a room or a person.
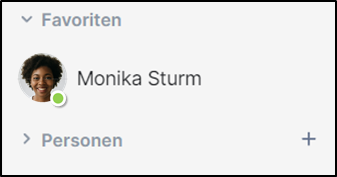
Figure 33: Contact Area - Favorites
Low Priority
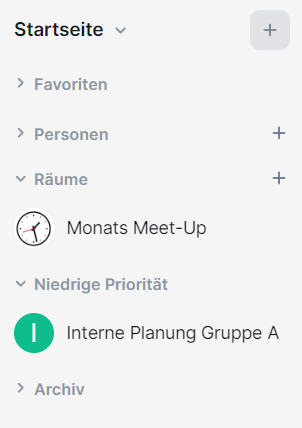
Figure 34: Contact Area - Low Priority
If you select the "Low Priority" option, a list is created with people and rooms that you have set to low priority. The grouping does not distinguish whether this is a room or a person.
Settings
If you click on this option, you can, if you are authorized, make various settings for the current chat room.
This includes icon and naming, security settings, and role and permission assignments.
People | Room Notification Options
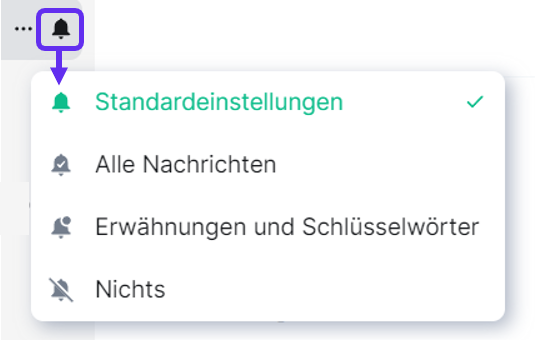
Figure 35: Contact Area - Notification Options
Set your desired notification option for private or group chats. The selected option is displayed in green text in the list and with a green checkmark in the selection.
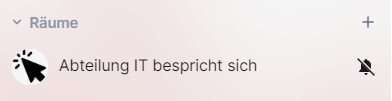
Figure 36: Contact Area - Notification Options - Symbol
When the menu is closed, the selected option can be recognized by the respective symbol to the right of the chat name.
Archive - Forget Room
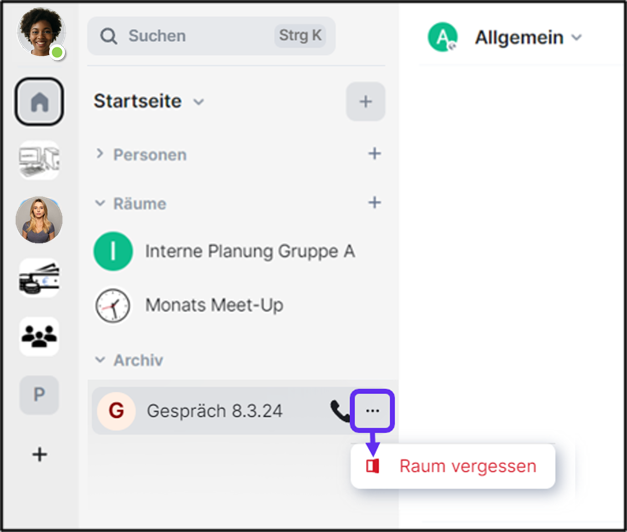
Figure 37: Contact Area - Archive
The above figure shows the collapsed sidebar and the focus on the contact area. By clicking on the next to a room, you can remove it from your contact area and the sub-item "Archive" by clicking on "Forget room".
Workspace
All communication activities take place in the workspace (for example: chat, voice messages, ...).
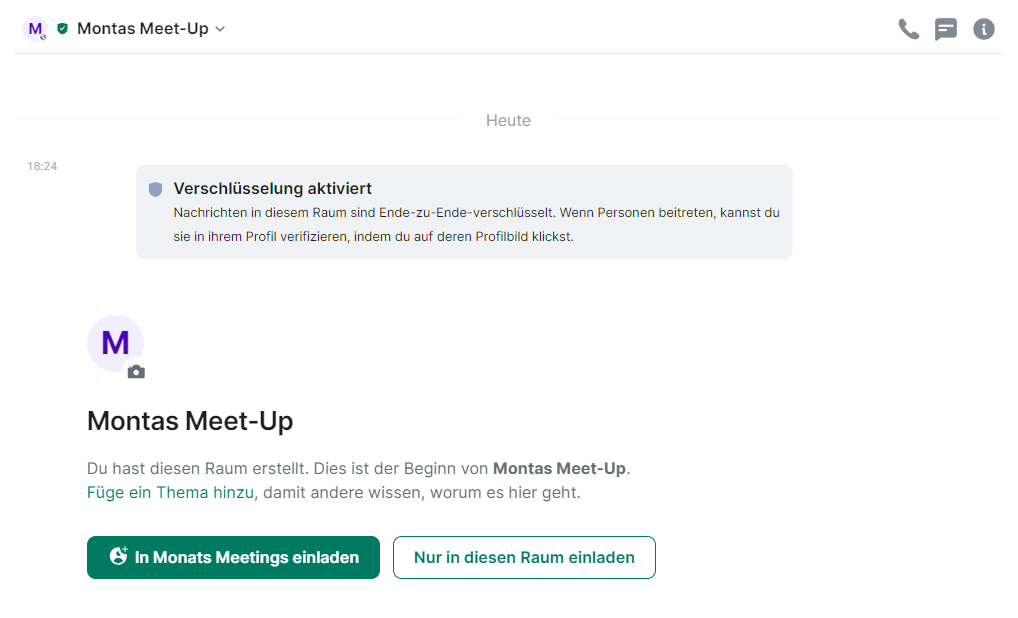
Figure 38: Interface - Workspace - Example of a room for a meeting
Depending on the action, you can access offered features via the workspace.
The menu bar in the upper right workspace is only displayed in individual or group chats, not in the so-called area overview of areas or after login on the home page of Vistameet.
In chapter "[6 Real-time Communication (internal)]", the functionality of the menu bar is discussed.